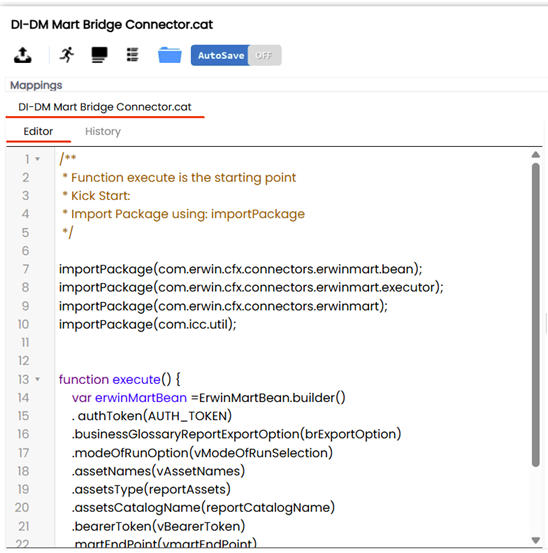
The DI-DM Mart Bridge connector syncs glossaries between erwin Data Modeler (erwin DM) and erwin Data Intelligence (erwin DI) via erwin Mart Portal. Basically, glossaries in erwin DM models are pushed to erwin DI under the business glossary manager via DM Connect for DI. You can then use the DI-DM Mart Bridge connector to harvest any updates made to these glossaries under Enterprise Glossary in erwin Mart Portal.
Prerequisites
Ensure that you have the connector file, DI_DM_Mart_Bridge_Connector.acp, to sync the business glossaries. To procure this connector file, reach out to us through the Sales team, Support team, Professional Services, or the PM team.
Downloading and Importing Connector
- Download the connector file named DI_DM_Mart_Bridge_Connector.acp.
- Log in to erwin DI.
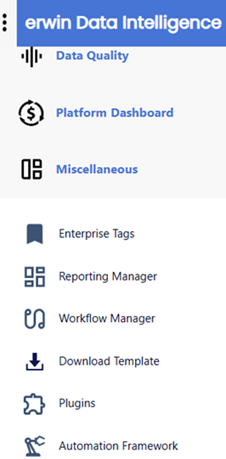
- Go to Miscellaneous and click Automation Framework.
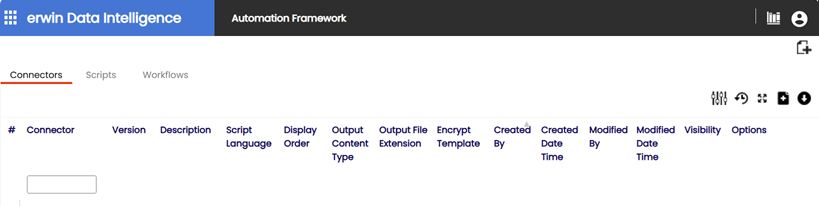
- On the Connectors tab, click
 .
. - Click Choose File.
- Select the downloaded connector file and click Open.
- On the Import Code Automation Connector page, click
 .
. - Refresh the page after the file is successfully imported.
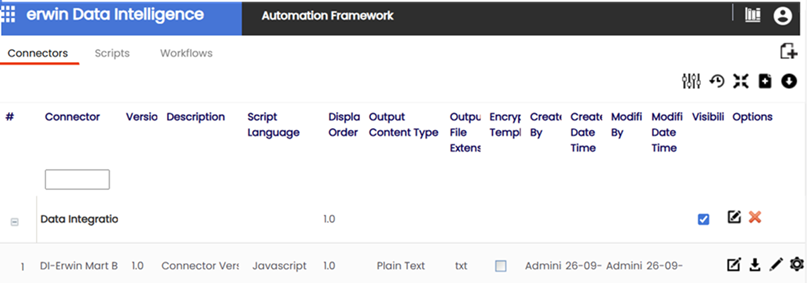
- Expand Data Integration to view the added connector.
- Select the connector and click
 .
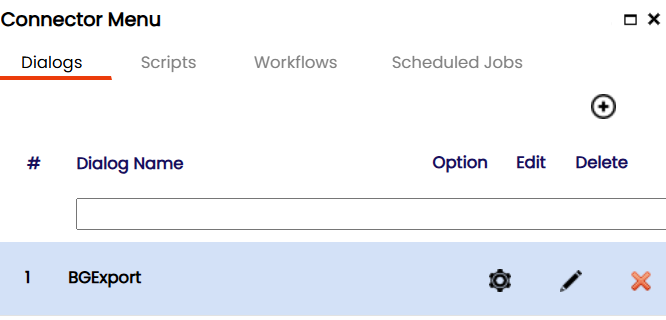
. - On the Dialogs tab, click .
The Automation Framework page appears.
This opens the Import Code Automation Connector page.
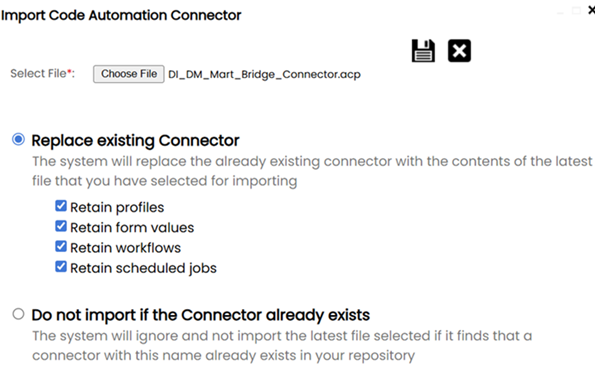
The success message appears for the imported file and the connector gets added.
The newly added connector is displayed.
This opens the Connector Menu page.
This opens the Connector Options Form.

Configuring DM-DI Mart Bridge
- Open erwin Mart Portal.
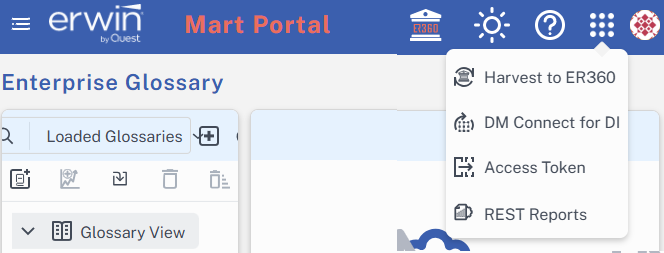
- On the header pane, click
 and then click Access Token.
 - Click Generate Token to generate the token.
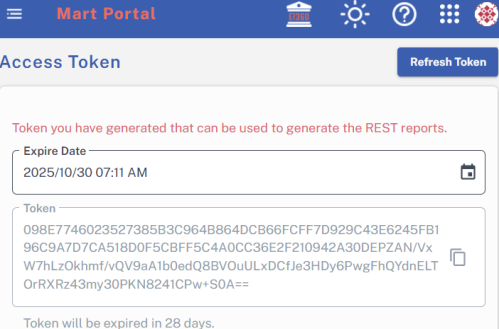
- Copy the token once it gets created.
- Go back to erwin DI.
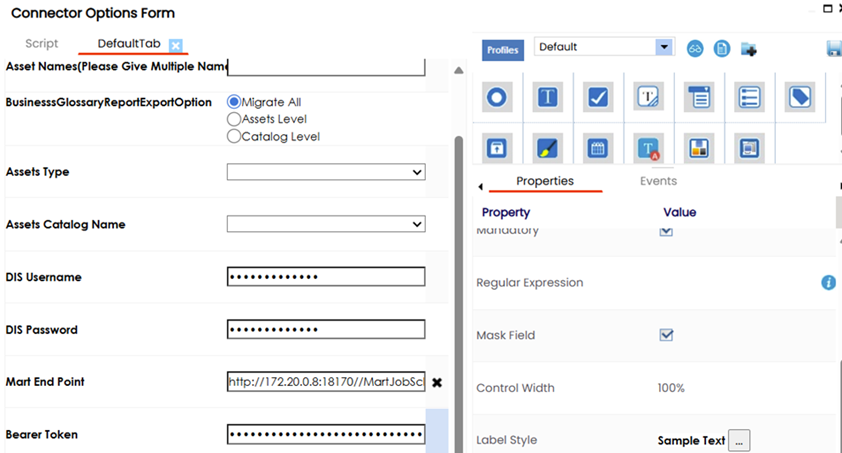
- In the Connector Options Form, select the Bearer Token option under DefaultTab.
- Deselect the Mask Field checkbox to view the token.
- In the left pane, select the complete token from the Bearer Token field and paste the copied access token there.
- Verify that the port number in the Mart End Point field matches the port number specified in the erwin Mart Portal URL. For example, port number, http/https.
- Click Save to save all the changes and close the form.
This opens the Access Token page.
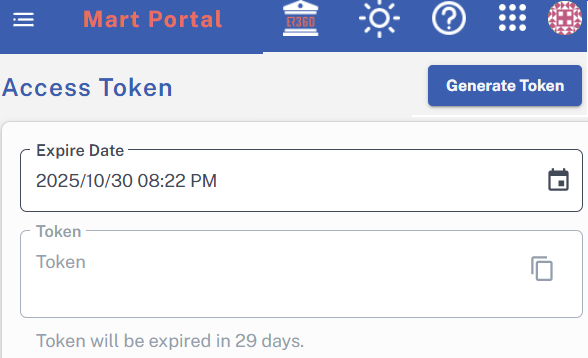
Access Token must be validated.
The token is generated and displayed in the Token field.
This opens the Bearer Token Properties tab in the right pane.
Harvesting Glossary to erwin Mart Portal
- On the Automation Framework page, double-click the connector.
- Click
 .
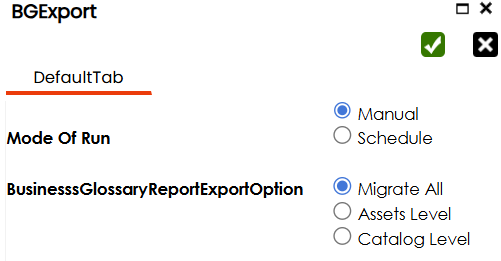
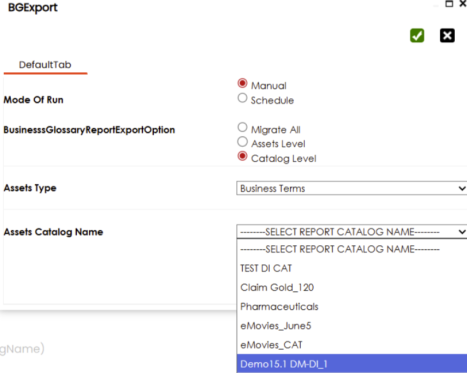
. - Select Catalog Level from the BusinessGlossaryReportExportOption and keep the Mode of Run as Manual to get a glossary.
- Select Asset type and Asset Catalog Name based on your requirements. For example, in this case, we selected Asset Type as Business Terms and Asset Catalog Name as Demo15.1 DM-DI_1.
- Click
 .
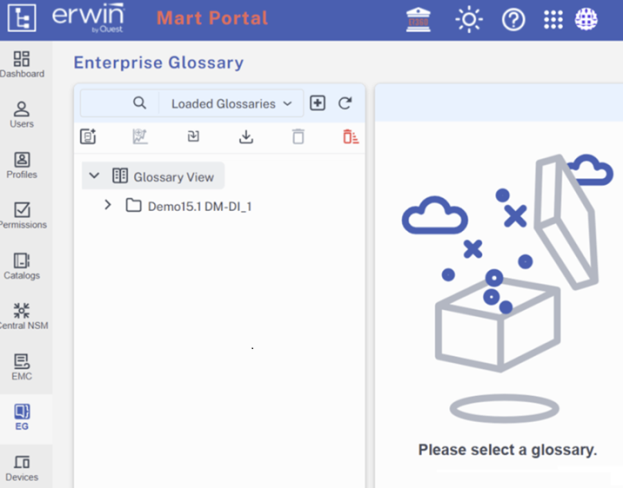
. - Go back to erwin Mart Portal and open the Enterprise Glossary.
- In the left pane, expand Glossary View to view the imported glossary folder.
This opens the Connector file.
This opens the BGExport page.
Avoid the Migrate All option as erwin Mart Portal only supports Business Terms. This must be followed if the catalog contains assets other than Business Terms (For example, Business Policies, Business Rules).
Ensure that the selected catalog exists in erwin DI.
|
Copyright © 2025 Quest Software, Inc. |